Since I grew up vegetarian, I’ve never (intentionally) eaten meat in my life. However, I do like having high-protein “meaty” foods. Seitan is incredibly versatile – it can be made into a wide variety of textures and flavors without many special tools (I only use a food processor, and even that isn’t strictly necessary).
Many people use vital wheat gluten (VWG) flour when making seitan. This is easy, allows for precise recipes, and allows incorporation of large amounts of liquid flavoring ingredients. However, it’s impossible (at least, in my pretty extensive experiments) to get quite the same texture, and many people find that VWG seitan has an unpleasant aftertaste.
The alternative is to make seitan from wheat flour (or other gluten-containing flour, such as spelt). Wheat flour consists of (mainly) starches, and protein (gluten). Seitan is made from the gluten part. Starch is conveniently water-soluble, while gluten is not, so the starch can be easily washed away.
That process is what this post is about!
There are many tutorials out there for washed flour seitan. I’m creating the tutorial I would have wanted when I started out. If this one isn’t to your liking, check out The Seitan Appreciation Society group on Facebook. It’s full of awesome, friendly people who will be happy to help you, lots of incredibly inspiring creations on a daily basis, and plenty of recipes and tutorials!
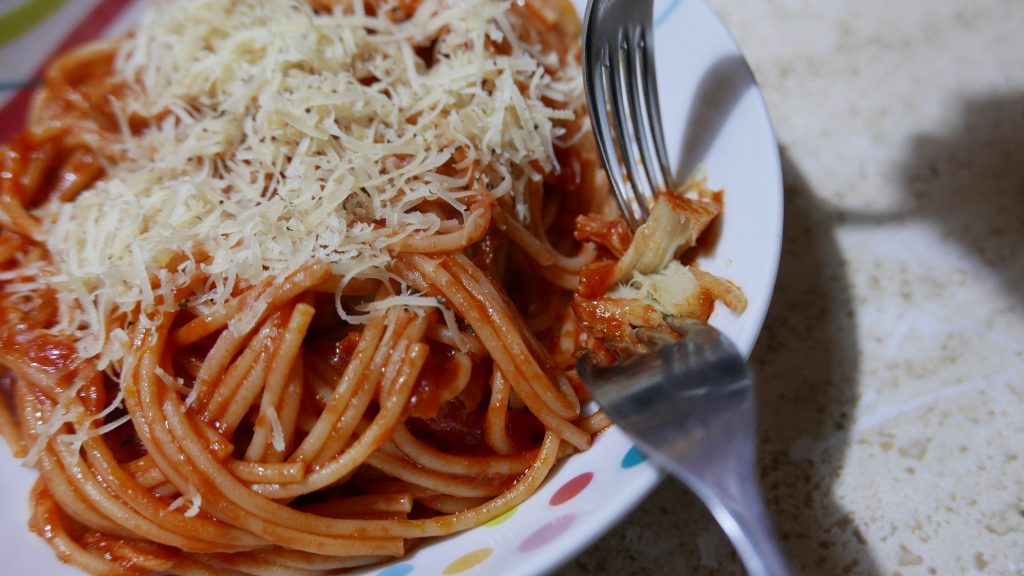
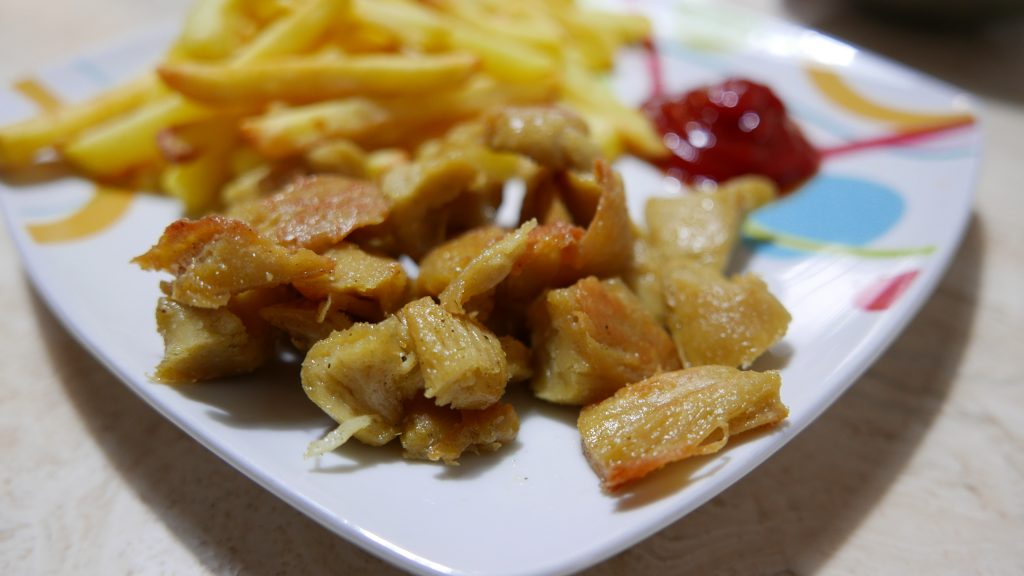
Some results
Before I get started with the method, I wanted to share a few examples of what you can do with washed flour “chicken.”


Tutorial!
What flour to use?
I get best results with type 00 Manitoba flour. This means very finely ground, high protein flour. Good quality, finely ground lower protein flour also works just fine for me (but of course, lower protein content means less seitan at the end).
If you can’t get type 00 Manitoba flour (or it’s prohibitively expensive), I would suggest to start with a white bread flour or all purpose flour until you get the hang of it. My experience is that whole wheat flour is more difficult (it likes to fall apart during washing).
Make the dough and rest it
First, you make a stiff dough. Knead it until it comes together and is elastic. (If you don’t want to knead, you can rest overnight instead. I’m too impatient for that.)
I kneaded for 5 minutes in my stand mixer, in two batches (5 minutes per batch).
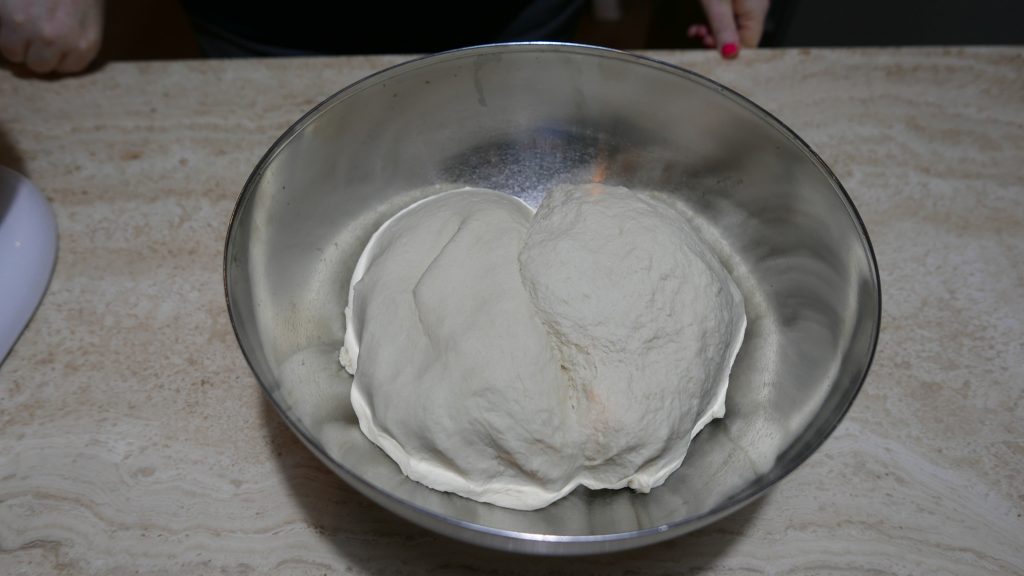
Then fill the bowl containing the dough with cold water, completely covering the dough, and rest it for 1 hour.
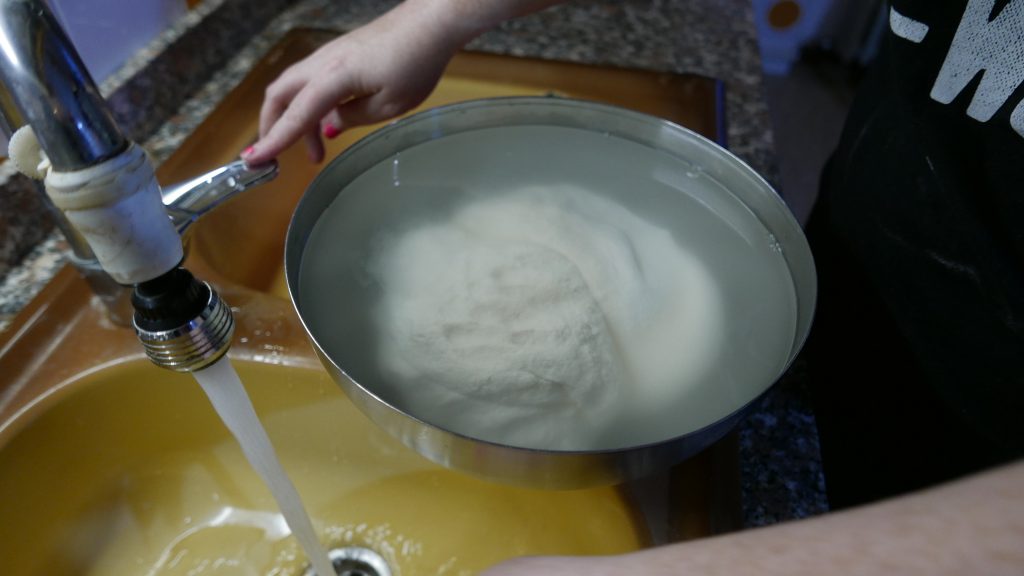
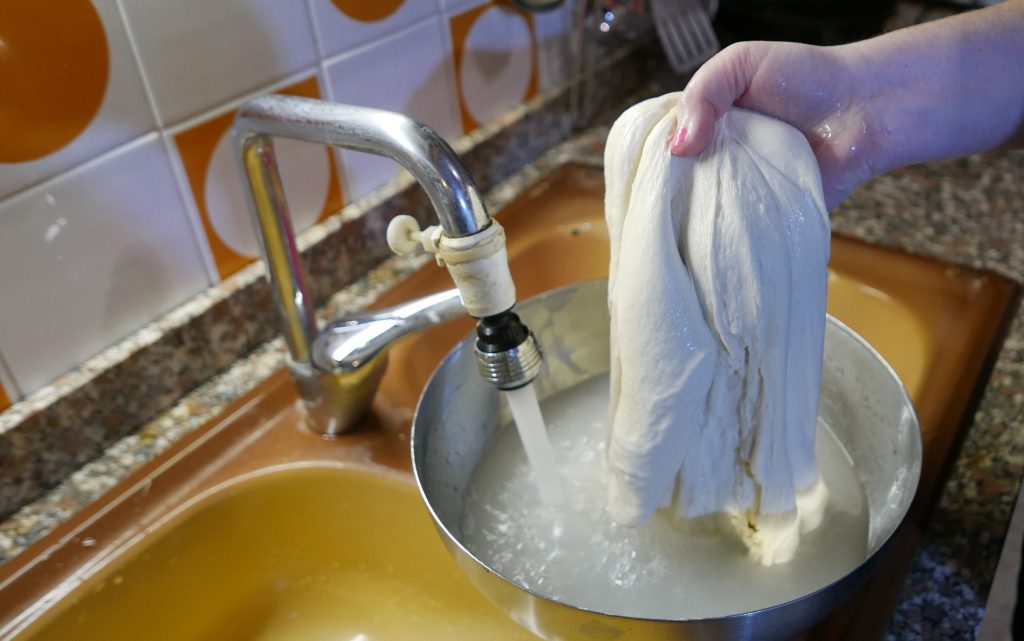
Wash the dough
Next is washing the dough!
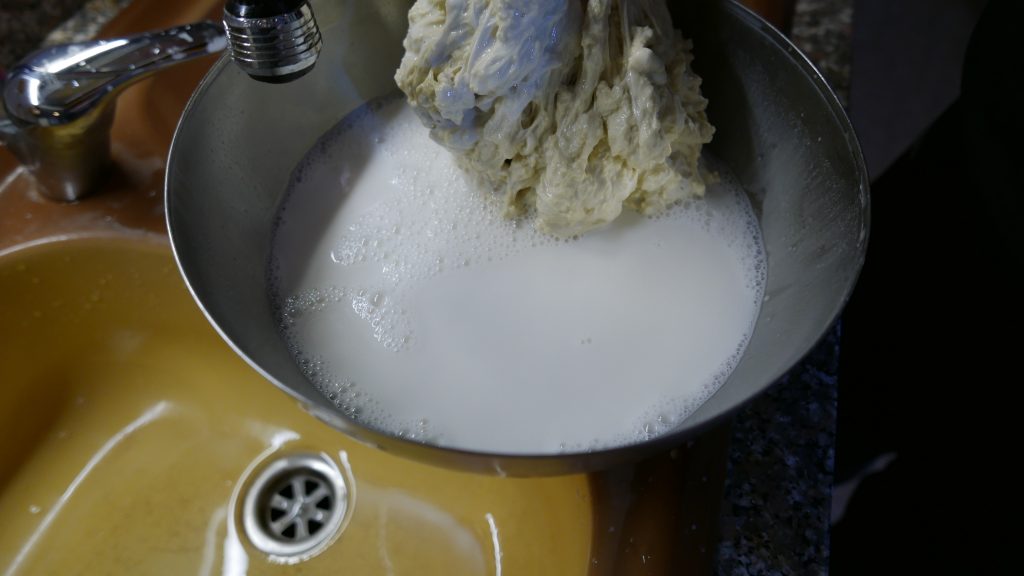
Pour the resting water out, and fill the bowl with water again. You can use whichever temperature water you want (your hands will be in it for awhile, so make yourself comfortable). I use cold water because we have old pipes and I’m concerned about something not-great leaching out of the pipes with hot water, but if you aren’t paranoid like me, use luke-warm water. (I’ve tested like this, and it works fine.)
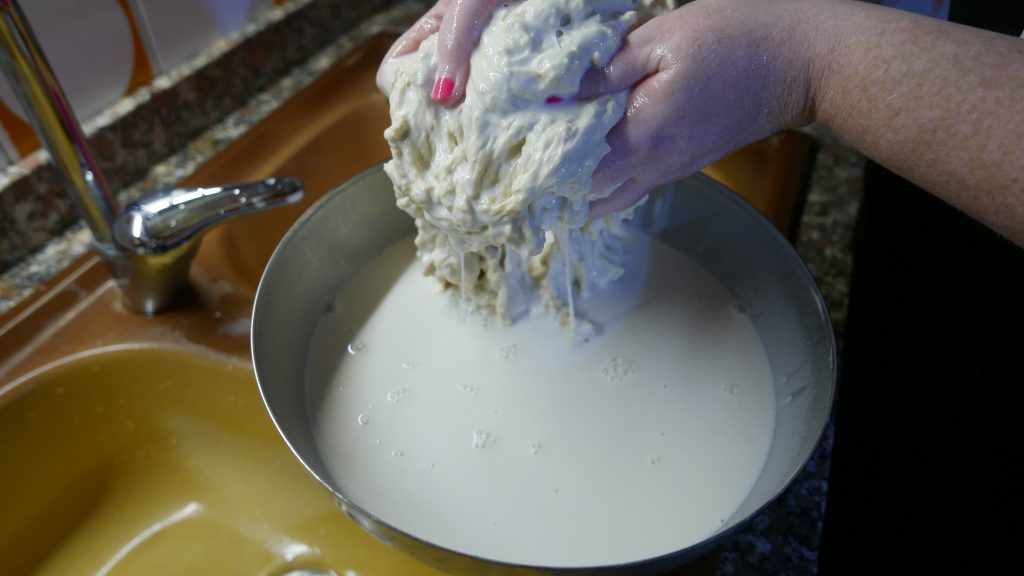
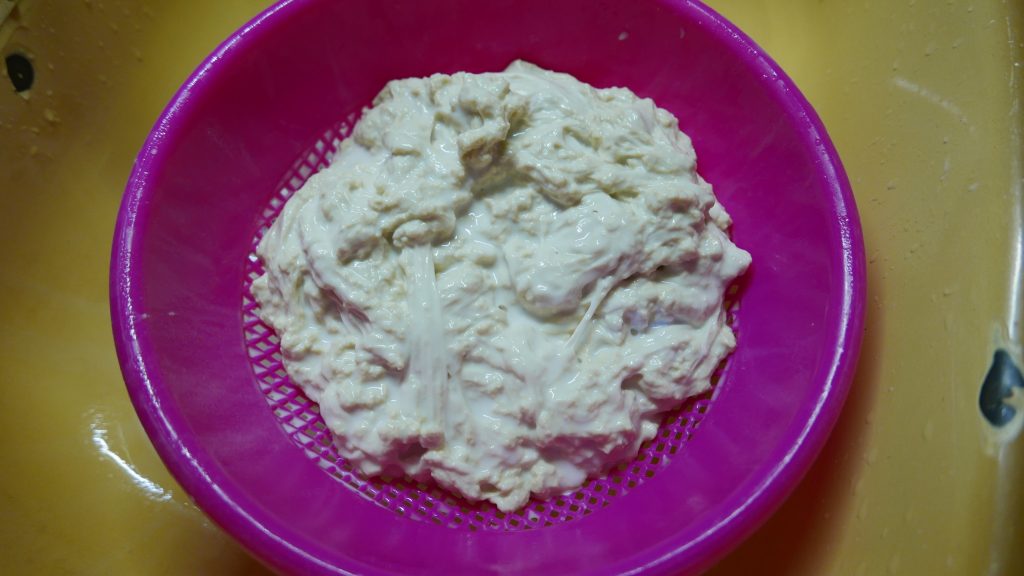
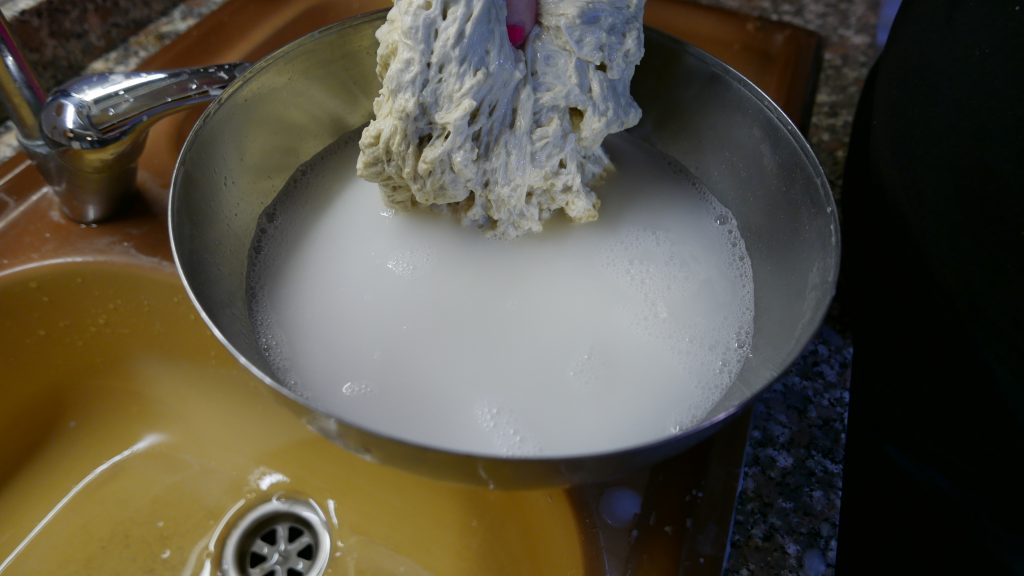
After you fill the bowl with water, you just repeatedly knead the dough under water, until the water is very saturated with starch. You can knead, squish, tear, etc. If you’re using an “easy” flour, you can be very aggressive here (and it will go faster). If you’re using a “difficult” flour, you need to be gentle and take breaks. If it starts to fall apart, squish it back together in your hands, and let it sit in the strainer for a bit before continuing. Some people suggest to add salt, but I haven’t noticed this helping at all.
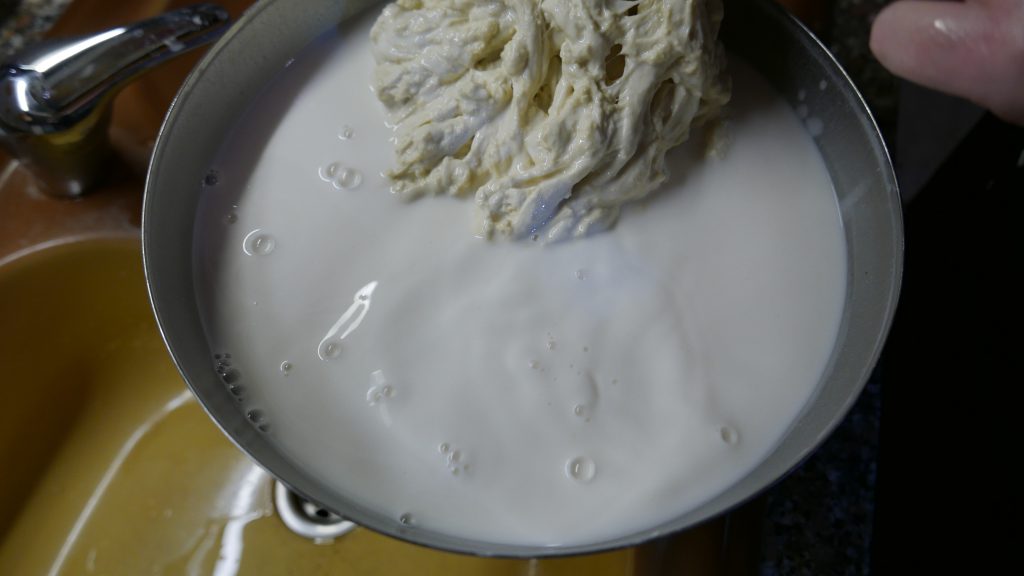
The dough will likely break into a number of squishy pieces during the first wash – this is okay, don’t worry, it will come back together!
After the first and second washes (and possibly third and fourth, depending on your flour), the water will be very starchy. It will feel a bit slimy and look milky. You can save this water and do other stuff with it, but when you first start, it’s easier to keep it simple (pour it down the drain, or use it to water your plants).
After the water is saturated, drain the dough, and repeat!
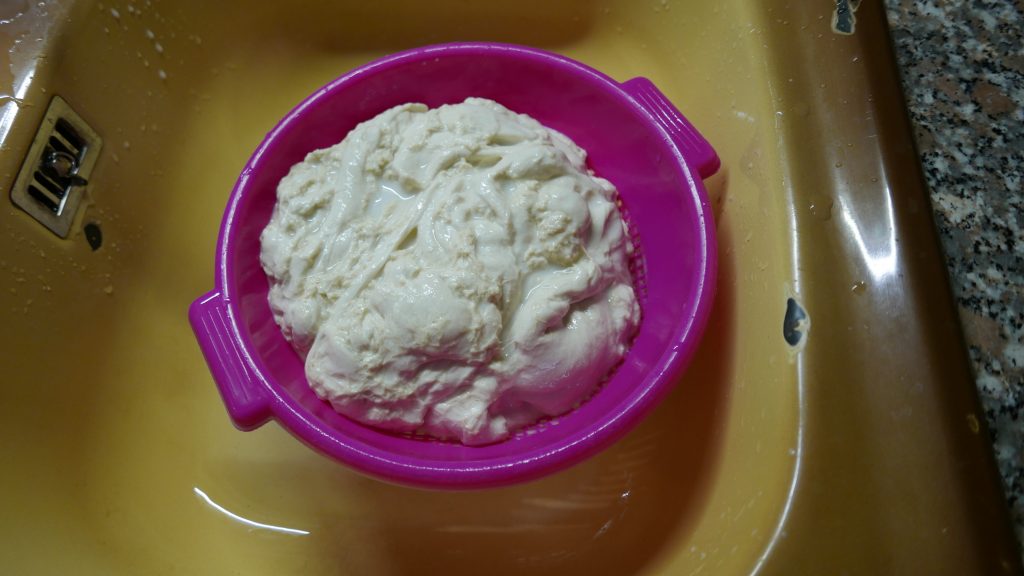
During the second or third wash, you’ll notice the dough beginning to feel a bit like rubber. It will be almost sticky, in a rubbery, not at all slimy way. When you start to feel this, it’s almost done!
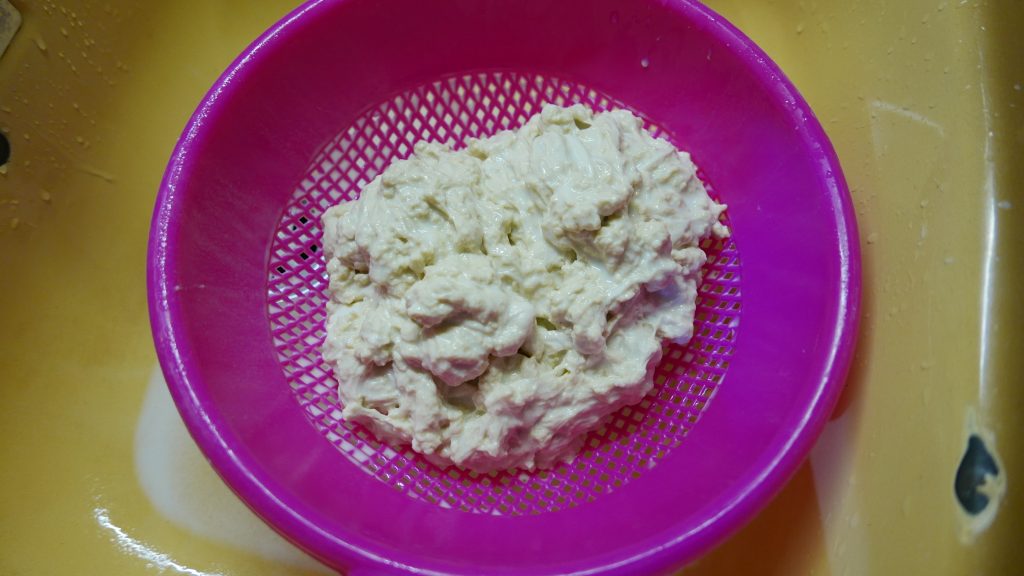
When the water only gets cloudy (not milky) after 10-20 seconds of washing — you’re done!
Don’t over-wash. That’s how you get rubbery seitan. No one wants rubbery seitan. Let the water stay a bit cloudy.
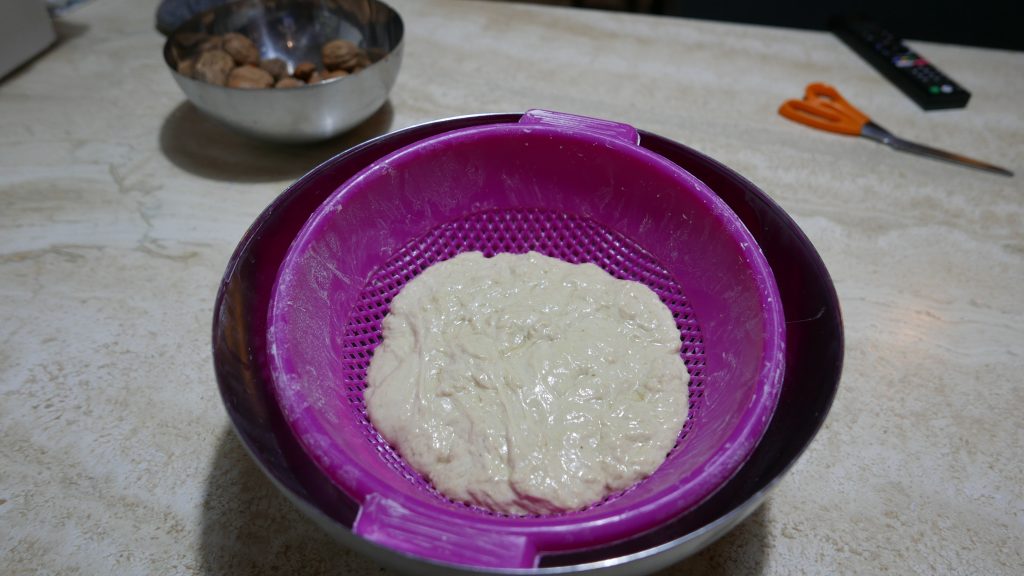
You’ll have to experiment a bit to find exactly the level of washing that you prefer – that makes the texture you like from your specific flour. This is what mine looks like when I’m done. Start from here (or wash a tiny bit more, but not a lot more than this!).
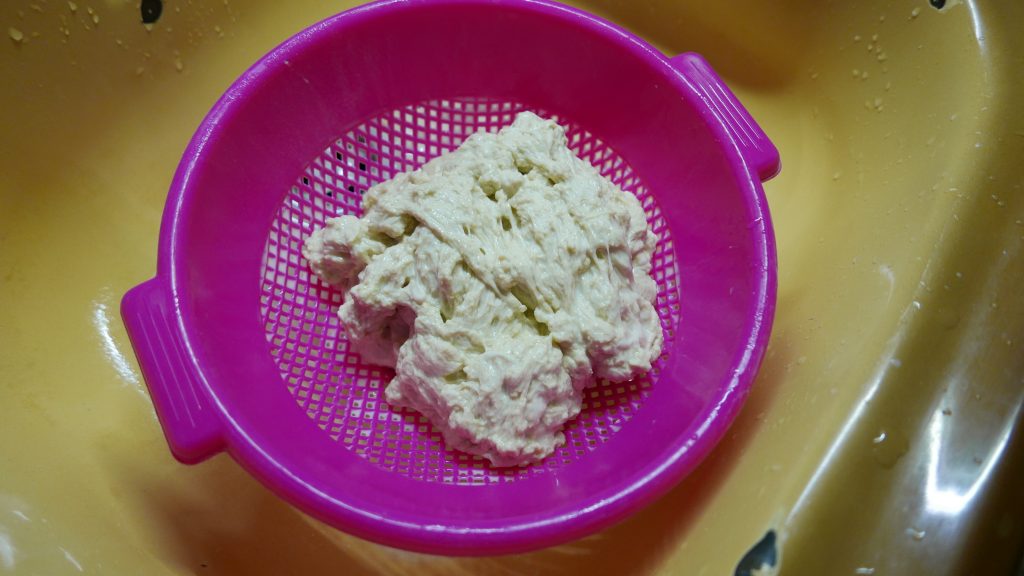
After you’re done washing, rest and drain the dough until it’s relatively smooth. If you’re in a hurry, you can squeeze as much water out as possible and proceed without resting. Ideally, rest for at least half an hour, though.

Incorporate seasonings
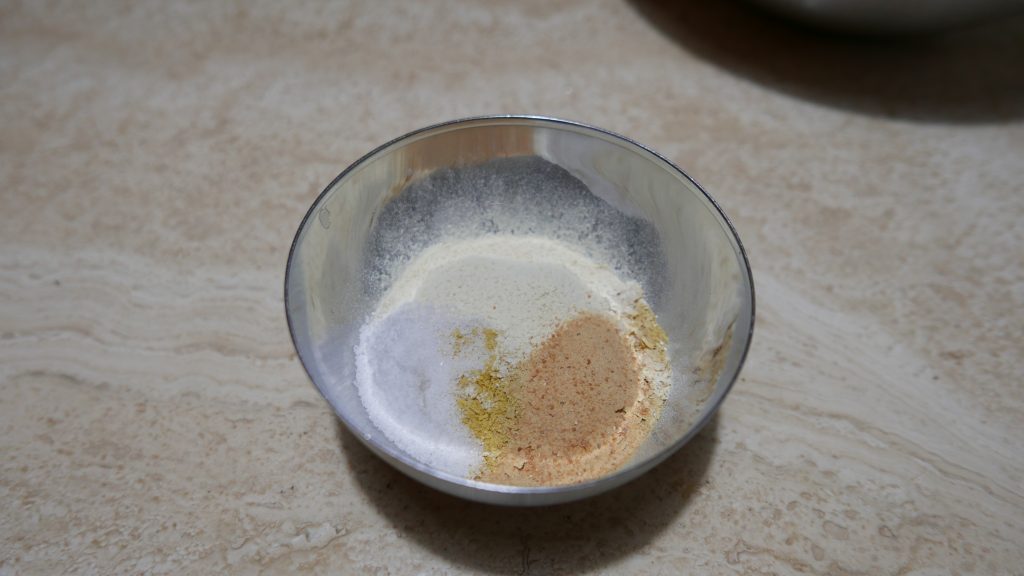
Next, incorporate seasonings into your dough! Some people skip this step, but I haven’t been able to get a flavor I like without it.
For “chicken” seitan, I use salt, nutritional yeast, onion powder, garlic powder, and poultry seasoning (or a mix of ground sage, rosemary, marjoram, and thyme). You can also add small amounts of liquid (such as soy sauce), or larger amounts of paste (miso, tomato paste, marmite, etc.).
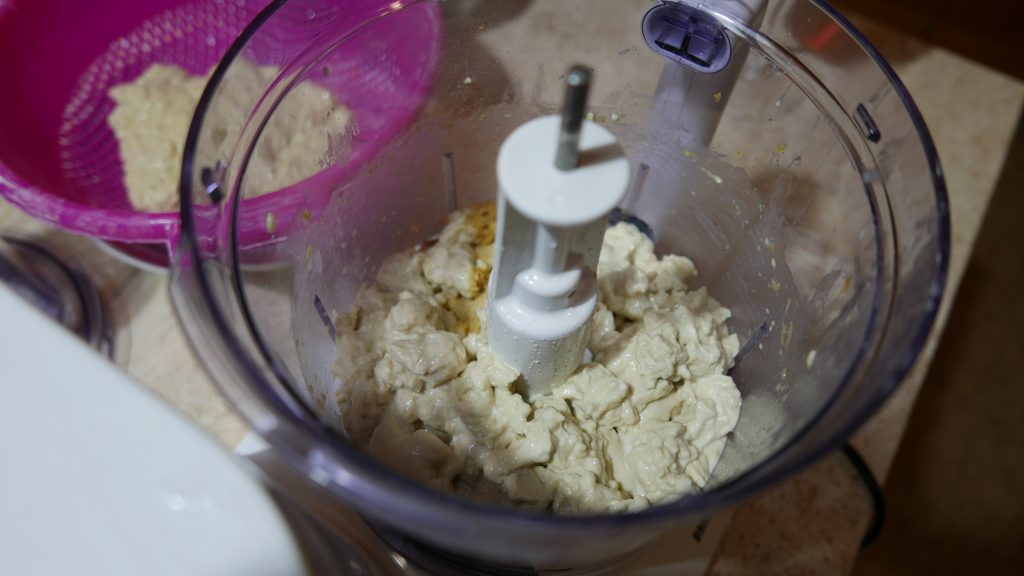
Cut or rip the seitan dough into small pieces, and process in the food processor until well combined. You probably will have to do this in batches (err on the side of smaller batches, because the gluten will get in every crevice of your processor and make it impossible to clean if you’re not careful).
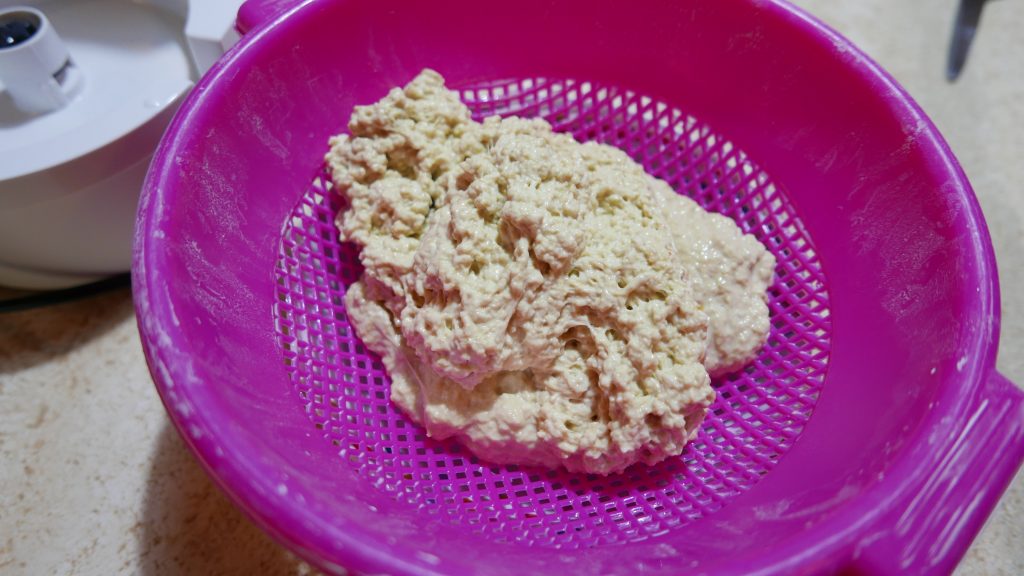
After the seasonings are incorporated, rest again! It’s important to rest until the dough gets very smooth, in order to get proper shreds. It may “melt” into a puddle – don’t worry, when you knot it, the tension will hold it together and make it firmer!
While the seitan is resting, prepare the broth. Bring it to a boil, and then turn it down to a simmer to wait for the seitan.
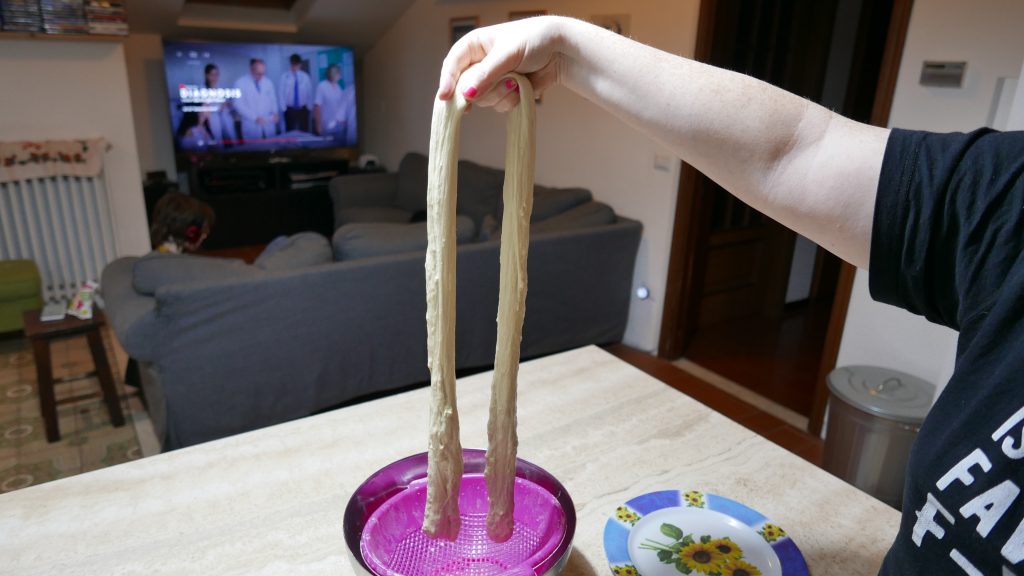
Stretching and knotting
The gluten has made lots of bonds while it was resting, but in order to get good shreds, you need to stretch the dough to make those gluten strands long and thin. And – after that – you need to hold those long thin strands in place while cooking.
The easiest way to do this is tying the dough into knots.
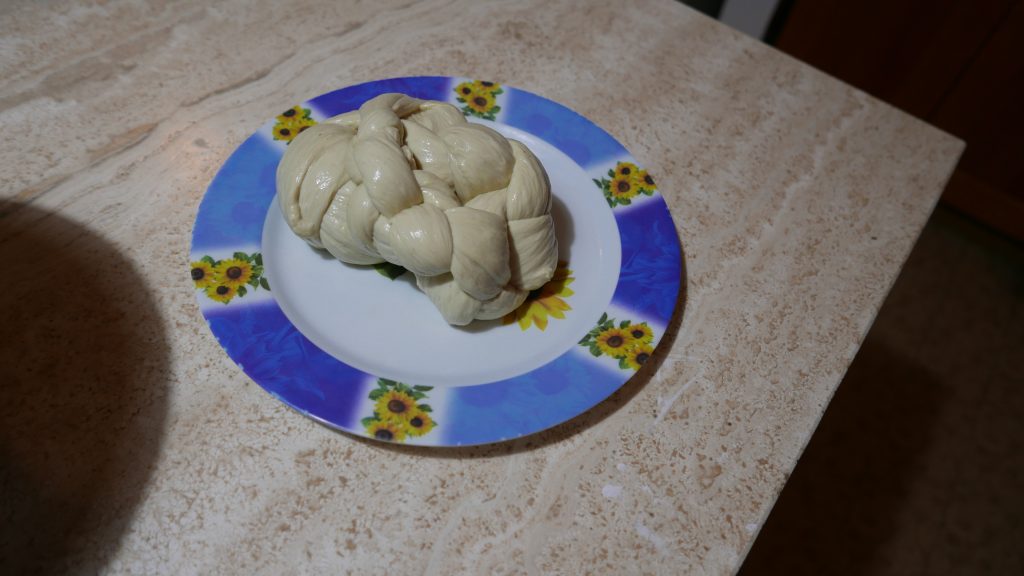
So – first stretch the dough into a long snake. Gently pull and squeeze the dough until it looks relatively smooth and is about 2 inches wide.
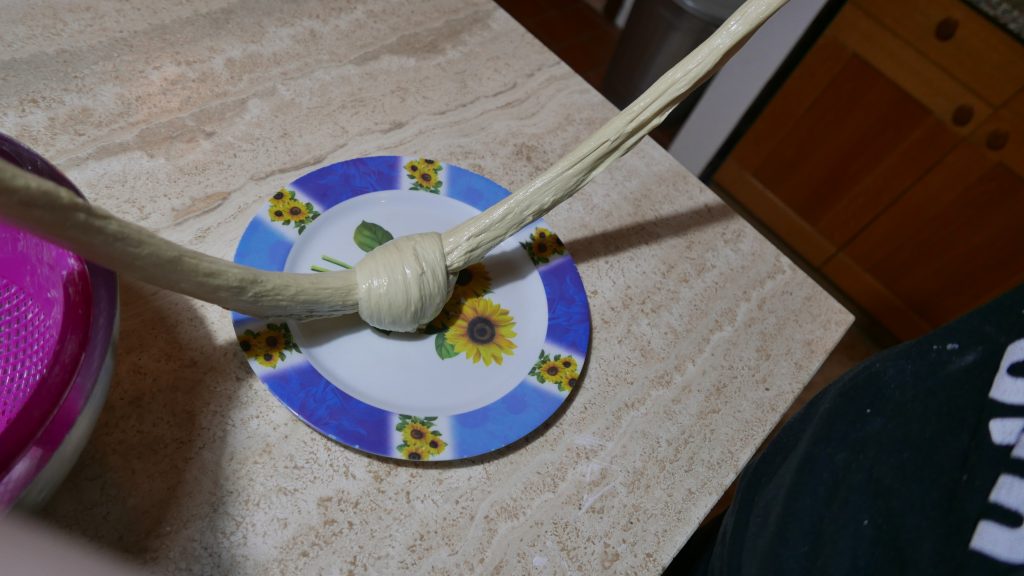
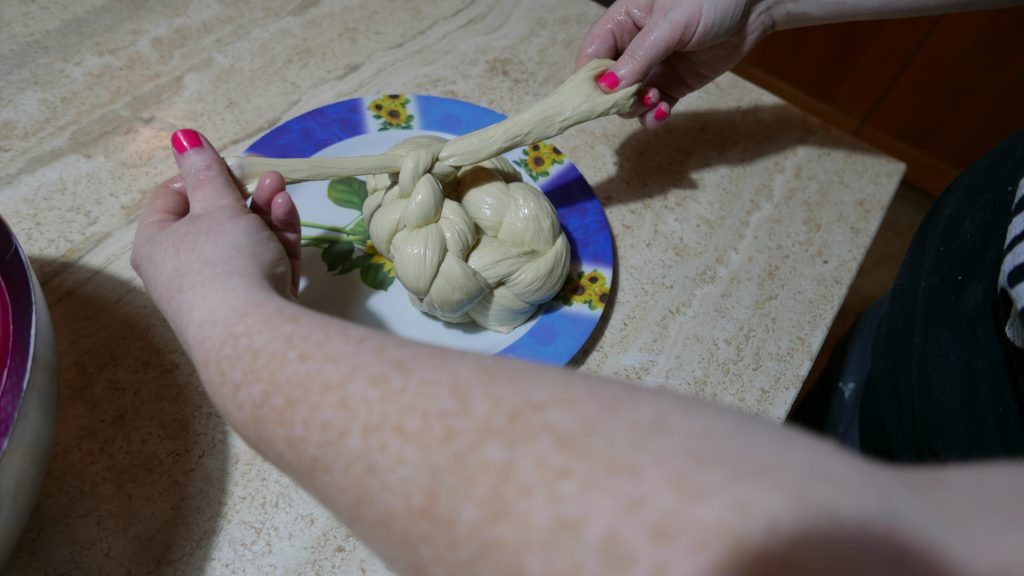
After it’s stretched, knot it repeatedly until it’s done. You can leave it as a long knotted string, or you can fold it over on itself and knot the last bit around to form a “chunk” (I like to do this, because it’s easier to manage in the broth).
It is absolutely not critical how you do this or how pretty it is! So long as you keep the dough stretched out, you are all good! My earlier attempts were way uglier than this, and they turned out amazing.
Depending on which type of flour you used and how much water you managed to get out during resting, when you knot the dough, it may melt back together. This is fine. Just keep going. You’ll still get good shreds even if you can’t really see distinct knots.
Simmer in broth
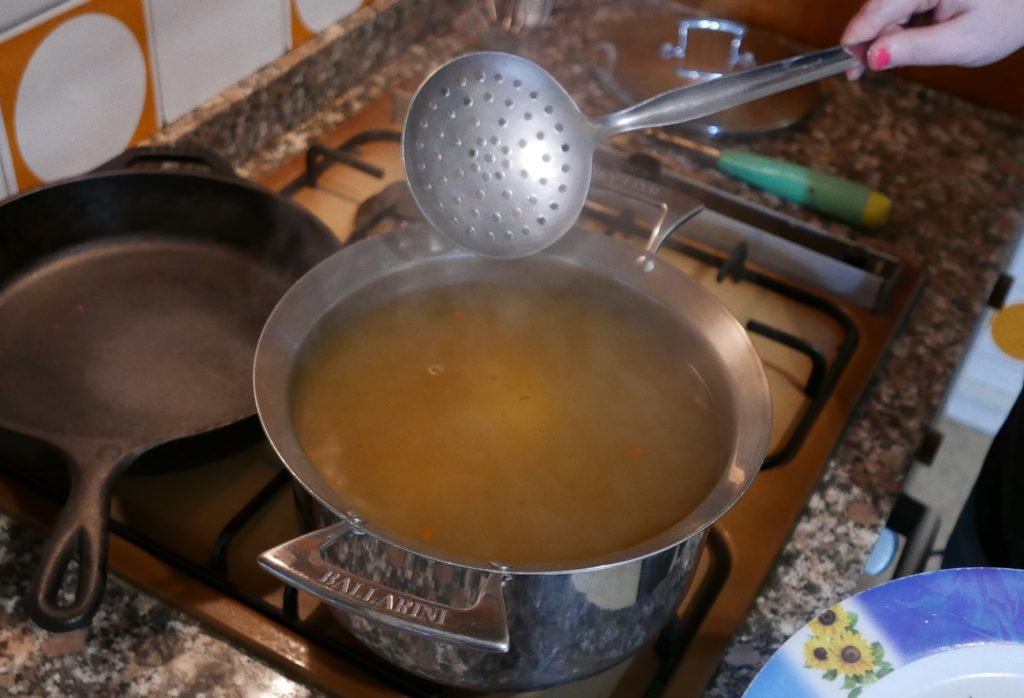
Cook the seitan in flavorful broth at a very low simmer. It’s critical that you keep the temperature very low. You should see either no bubbles at all, or very few, occasional, small bubbles. Err on the side of too low rather than too high.
If the seitan gets too hot at this stage, it will be gross and spongy. If you see bubbles start, move the pot off the heat immediately and stir.
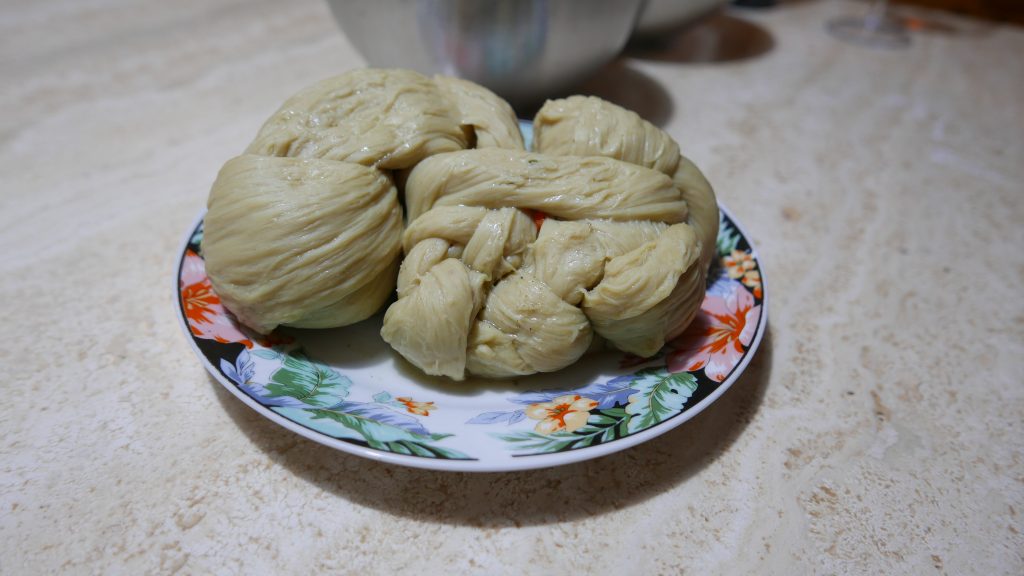
Add the seitan to the simmering broth, and stir a few times during the 5 minutes after you’ve added it, to avoid sticking to the bottom. Cook for 30-45 minutes (depending on the size of the seitan), and then leave the seitan in the broth to cool for at least 30 minutes.
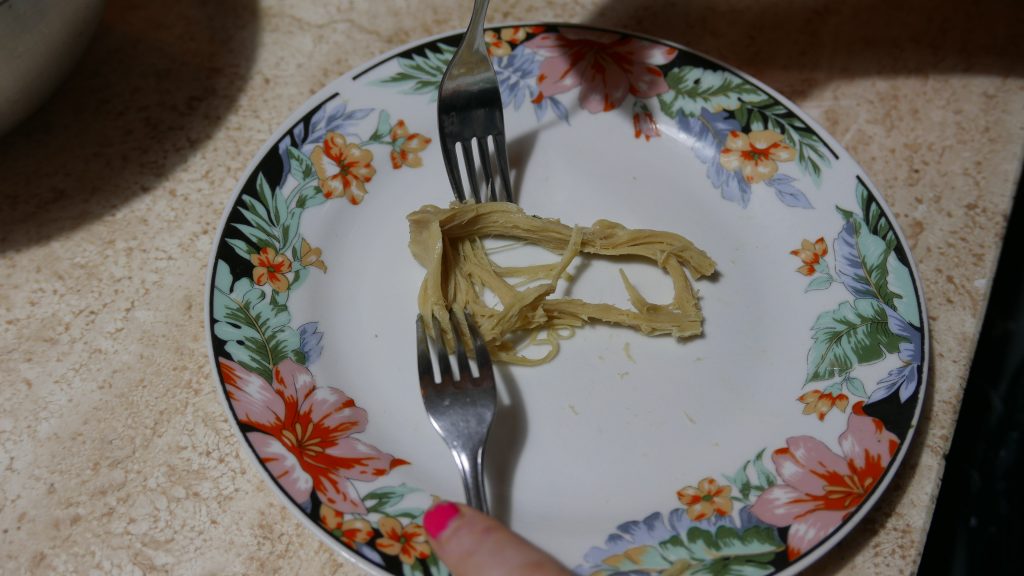
Chop or shred the seitan
At this stage, if you’re not sure how you plan to use the seitan, you can just put it in broth in the fridge.
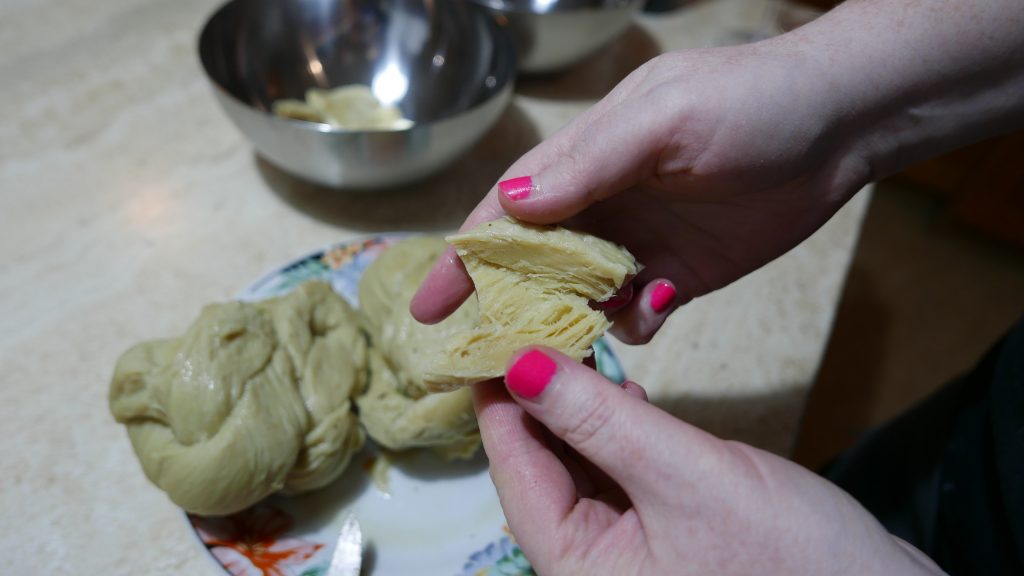
However, if you plan to shred it, it’s easier when the seitan is still warm from the broth. If you want very fine shreds, you should probably do it right away.
To shred, cut manageable chunks, and shred them, either with your fingers (gives the best result but is very tedious) or with two forks.
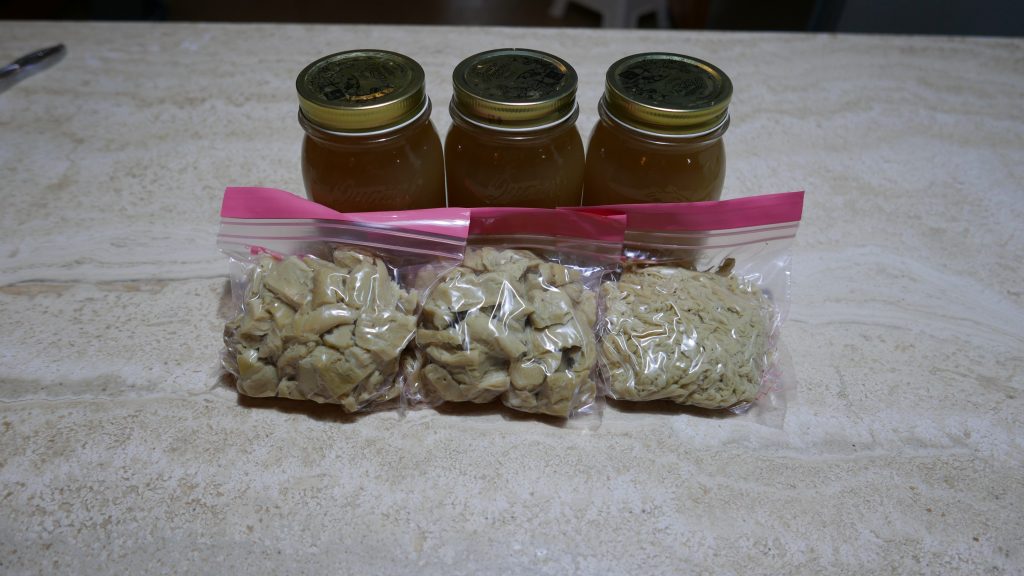
Storage
If you don’t cut or shred the seitan, store it in a tupperware container, covered in broth.
If you do chop or shred it, store it in ziplock bags with as much air removed as possible.
Also save the broth – it’s really good for soup, gravy, etc.

You can get significantly finer shreds than this, if you’re very patient!
Cooking
Use the seitan in recipes that call for chicken, but be careful not to let it dry out. The seitan has very low fat content, so you may need a bit extra oil or liquid as compared to meat recipes.
Washed Flour Chicken Seitan
Equipment
- Food processor
Ingredients
Dough
- 1.5 kg flour (about 12.5 cups) ideally type 00 Manitoba, or any higher protein, finely ground flour
- 3 ¾ cups water
Seasoning
- ½ cup nutritional yeast (30 g)
- 1 tsp salt
- 1 tsp onion powder
- 1 tsp poultry seasoning, ground or a mix of ground sage, rosemary, thyme, and marjoram, or other seasonings you prefer
- ½ tsp garlic powder
Broth
- vegetable broth enough to fill the pot 3/4 full
- ¼ cup nutritional yeast
- 1 tsp onion powder
- ½ tsp garlic powder
- 1 tsp poultry seasoning or other spices, as desired
Instructions
- Mix the flour and water, and knead into an elastic dough.
- Cover the dough in water, and rest for 1 hour.
- Wash the dough (follow tutorial above) until the water is somewhat cloudy, but no longer milky.
- Rest the dough for half an hour.
- Incorporate seasonings into the dough in a food processor.
- Rest the dough until smooth (30 minutes – 1 hour).
- While the dough rests, prepare the broth and bring to a boil. Turn down to very low simmer.
- Once the dough is smooth, form it into a long "snake," and knot it repeatedly.
- Simmer the dough in the broth for 45 minutes.
- Turn off heat, and cover. Cool the seitan in the broth for 30 minutes – 1 hour.
- If making shreds, shred the seitan while it is warm.
- Store shreds or chunks in ziplock bag with as much air as possible removed, or if not shredding/chopping, store the seitan in a tupperware, covered in broth.
- Use seitan within 1 week, or freeze (in ziplock bag, without liquid) for several months.